2009
12.20
For my Areca 1210 raid card I wanted the “Utility” to run on startup. In Debian/Ubuntu this is really easy:
- Create the (startup) scrip; In my case this looked like this:
#!/bin/bash
#
#  set -x;
#
cd /root;
screen -d -m arc_http;
- Create a symlink to /etc/init.d/
sudo ln -s ~/Documenten/bin/arc_http.sh /etc/init.d/
- Run the update-rc.d script
sudo update-rc.d arc_http.sh defaults
If you want to remove the startup script for some reason you can do this by executing this command:
sudo update-rc.d -f arc_http.sh remove
Further reading:
2009
12.20
In this howto I will show how I compiled a custom kernel in Ubuntu 8.10 (Intrepid Ibex). First we have to install some packages:
apt-get install kernel-package libncurses5-dev fakeroot wget bzip2;
apt-get install linux-source;
The newly installed kernel-sources are in /usr/src
cd /usr/src;
tar -xjvf linux-source-2.6.27.tar.bz2;
ln -s linux-source-2.6.27 linux;
cd linux;
After unpacking and changing to the appropriate directory we have to copy our old (kernel) .config and we are ready to go!
cp /boot/config-$(uname -r) ./.config;
make menuconfig;
Here are some screenshots of how I configured my kernel:
PS; I am on an Intel Core2 Quad Q9550 with:
- 8GB memory
- ATI HD Radeon 3600 series
- Areca ARC1210 with 4 x WD RE3 WD7502ABYS (RAID 10)
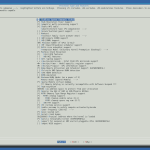 processor type and features |
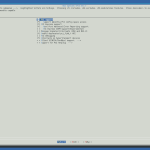 bus options |
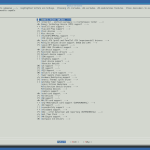 device drivers |
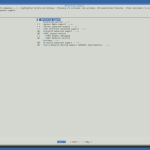 networking support |
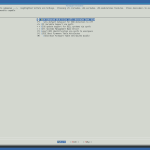 firmware drivers |
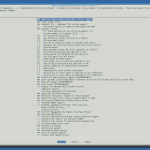 ubuntu supplied third-party device drivers |
You will probably come across this bug. Adding --arch=amd64 --subarch=x86_64 when calling make-kpkg will fix it:
make-kpkg clean --arch=amd64 --subarch=x86_64;
fakeroot make-kpkg --initrd --append-to-version=-quad \
kernel_image kernel_headers --arch=amd64 --subarch=x86_64;
pin package
If everything went well, we can install our packages and make sure we pin them (although you shouldn’t need to worry if you used --append-to-version)
dpkg -i linux-headers-2.6.27.18-quad-rt_2.6.27.18-quad-10.00.Custom_amd64.deb;
dpkg -i linux-image-2.6.27.18-quad-rt_2.6.27.18-quad-10.00.Custom_amd64.deb;
If you come across this bug:
/etc/kernel/postinst.d/nvidia-common exited with return code 20
Failed to process /etc/kernel/postinst.d at ...
Just:
sudo apt-get purge nvidia-common
sudo apt-get install nvidia-common
and everything will work like a charm!
References:
2009
12.18
My friend Bart Dorlandt showed my this trick a long time ago, but I still use it each time I (re)install my desktop/laptop:
Want to get rid of the “Recent Documents” in your Gnome Menu. Execute this in your home folder.
rm .recently-used.xbel
mkdir .recently-used.xbel
2009
12.14
In CentOS (5.3) php’s shell_exec() function is disabled by default. When you try to use it you’ll see messages like this:
PHP Warning: shell_exec() has been disabled for security reasons in /var/www/...
in your error_log files. I thought it had something to do with the safe_mode in /etc/php.ini, but it turned out I had to change this line instead:
disable_functions = show_source,system,shell_exec,passthru,exec,phpinfo,proc_open
to
disable_functions = show_source,system,passthru,phpinfo,proc_open;
And after that, restart Apache:
service httpd restart
2009
11.25
If you’re still on Debian Sarge, Woody or Potato you (seriously) might want to consider an upgrade. But if, for some stupid reason, you can’t it would be nice to still have the repositories available. This is where the Debian Archive Repository comes in handy. Using it is quite simple:
And this is how your sources.list may look like:
#
# sarge
#
deb     http://archive.debian.org/debian/                               sarge           main contrib non-free
deb-src http://archive.debian.org/debian/                               sarge           main contrib non-free

#
#  updates
#
deb     http://archive.debian.org/debian-archive/debian-security/       sarge/updates   main contrib non-free
deb-src http://archive.debian.org/debian-archive/debian-security/       sarge/updates   main contrib non-free

#
# backports
#
deb http://archive.debian.org/debian-archive/backports.org              sarge-backports main contrib non-free
2009
11.10
A Wireless Distribution System (WDS) is a system that enables the wireless interconnection of access points in an IEEE 802.11 network. It allows a wireless network to be expanded using multiple access points without the need for a wired backbone to link them, as is traditionally required. The notable advantage of WDS over other solutions is that it preserves the MAC addresses of client packets across links between access points.
An access point can be either a main, relay or remote base station. A main base station is typically connected to the wired Ethernet. A relay base station relays data between remote base stations, wireless clients or other relay stations to either a main or another relay base station. A remote base station accepts connections from wireless clients and passes them on to relay or main stations. Connections between “clients” are made using MAC addresses rather than by specifying IP assignments. All base stations in a Wireless Distribution System must be configured to use the same radio channel, method of encryption (none, WEP, or WPA) and encryption keys. They can be configured to different service set identifiers. WDS also requires that every base station be configured to forward to others in the system.
WDS may also be referred to as repeater mode because it appears to bridge and accept wireless clients at the same time (unlike traditional bridging). It should be noted, however, that throughput in this method is halved for all clients connected wirelessly.
This is how I set it up:
| accesspoint 1 |
(The WAN port of this router is connected to the Internet) |
| hostname |
ap01 (screenshot) |
| mac |
00:23:69:94:17:B2 |
| ip (lan) |
192.168.16.1 |
| dhcp server |
enabled (192.168.16.100 – 192.168.16.199) |
| link with |
00:23:69:94:A1:B2, 00:23:69:94:11:82 |
accesspoint 2
|
(The WAN port of this router is not used) |
| hostname |
ap02 (screenshot) |
| mac |
00:23:69:94:A1:B2 |
| ip (lan) |
192.168.16.2 |
| gateway |
192.168.16.1 |
| dns server |
192.168.16.1 |
| dhcp server |
disabled |
| link with |
00:23:69:94:17:B2 |
accesspoint 3
|
(The WAN port of this router is not used) |
| hostname |
ap03 (screenshot) |
| mac |
00:23:69:94:11:82 |
| ip (lan) |
192.168.16.3 |
| gateway |
192.168.16.1 |
| dns server |
192.168.16.1 |
| dhcp server |
disabled |
| link with |
00:23:69:94:17:B2 |
This results in a situation like this:
 internet
    |
    |
    #ap01
   /  \
  /    \
 #ap02  #ap03
To see if everything is working you could of course just grab your laptop and walk through your house / office and see how it behaves. A better way might be to check first if the accesspoint are connected (to each other, and the internet) at all. You can do this at the “Device List” page of Tomato. It chould display something like this: ap01, ap02, ap03. After that, if everything is working like it should, (re)connect your clients and check if they appear in the “Device List” page (of ap01). Have fun!
References:
2009
11.09
What is User Account Control?
User Account Control (UAC) is a new security component in Windows Vista. UAC enables users to perform common tasks as non-administrators, called standard users in Windows Vista, and as administrators without having to switch users, log off, or use Run As. A standard user account is synonymous with a user account in Windows XP. User accounts that are members of the local Administrators group will run most applications as a standard user. By separating user and administrator functions while enabling productivity, UAC is an important enhancement for Windows Vista; Not! It’s so annoying… Every 2 seconds you get this prompt.
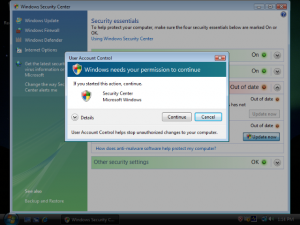
Vista UAC Prompt
That’s why we want to disable it! The easiest way is using the Using Control Panel
- open the “Control Panel”
- click on the “Change security settings” link
- In the “Turn on User Account Control (UAC) to make your computer more secure” window click to unselect the “Use User Account Control (UAC) to help protect your computer” Click on the OK button.
- You will be prompted to reboot your computer
- After that, UAC should be dead!
A more extensive article on this topic can be found here
2009
11.08
Komodo Edit is a free, open source editor from dynamic language experts
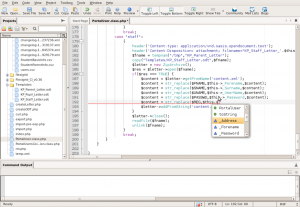
KomodoEdit Variable Completion
Whatever Your Language
Komodo Edit supports PHP, Python, Ruby, Perl and Tcl, plus JavaScript, CSS, HTML and template languages like RHTML, Template-Toolkit, HTML-Smarty and Django. In combination with the SciViews-K extension you can also transform it into a R editor and GUI. This is how you do it:
Installation
To use SciViews-K, you have to install four components: R, Komodo Edit, the SciViews-R additional packages in R, and the SciViews-K extension in Komodo:
- Download and install R (installers for Linux, Mac OS X universal, Windows, …)
- Download and install Komodo Edit (installers for Linux, Mac OS X Intel or PowerPC, Windows, …)
- Download the SciViews-K 0.9.7 Komodo extension if you use R >= 2.10, or SciViews-K 0.9.5 if you use R 2.9.x. To install the downloaded file, just open it on Komodo Edit, or drag and drop it in the Komodo window. You will be prompted to restart Komodo.
- To install R packages and configure R properly, start it from Komodo. Use the menu entry R -> Start R. R starts and is configured. When it is done, you should see a message: “R is SciViews ready!”.
- Further commands and two customisable toolbars for R are provided in the Komodo toolbox SciViews-K. Dowload it, and then, install it by the menu entry Toolbox -> Import Package..., and select the imported file.
- There is also an R reference toolbox that is not unlike R Commander (R reference). Dowload it, and then, install it by the menu entry Toolbox -> Import Package..., and select the imported file.
First use
Once you have installed all components, close R and Komodo. Then, restart Komodo and start R from within Komodo (menu entry R -> Start R). R should be automatically configured to operate with Komodo. Now, you should have a fully operational SciViews-K R GUI. You can explore the various tools in the ‘SciViews-K’ extension. Make sure you look also at the shortcuts (Help -> List key bindings menu entry). Here are a few specific shortcuts added to start with:
- F1 for contextual R help on the word under the cursor in the editor
- Alt-Shift-F1 for help search selected word (make sure to look at the Web menu too)
- Ctrl-T (Command-T on the Mac) to expand abbreviation (try typing func, then hit Ctrl-T in a R code Komodo buffer. Look at the toolbox under SciViews-K/Abbreviations to see the list of possible abbreviations you can use in R code.
- Ctrl-Return is the same as Return but also run the line of code in R
- Ctrl-Shift-R to run selection and/or code line by line
- Ctrl-Shift-A to run all code in the current document in R
- Ctrl-Shift-F to run the current function
- Ctrl-Shift-H to run a paragraph (consecutive lines of R code)
- Ctrl-Shift-M to run code between two bookmarks (define bookmarks first!)
- Ctrl-Shift-S to summarize the object whose name is under the cursor
- Ctrl-Shift-L to plot the object whose name is under the cursor
- F3 to search next occurence of the word under the cursor
- F4 to list R objects in memory (in .GlobalEnv)
- F7 to set the R working directory to the dir of the current edited file in Komodo
Warning: The socket server in R uses Tcl/Tk. Hence, you must ensure that you can use the ‘tcltk’ package in R, and install all required components. Under Windows, everything is installed for you if you select the corresponding features in the installer. For other OSes, consult the R ReadMe and FAQ files in case of problems.
References:
2009
11.02
The function  defined by
  where
where  , and the exponent
  is any real number, is called an exponential function with base
When you work with exponential functions, it may be necessary to apply rules for exponents. These rules are as follows, where  and
and  are real numbers and
  and
and  are positive.
Graphs of some exponential functions are shown below:
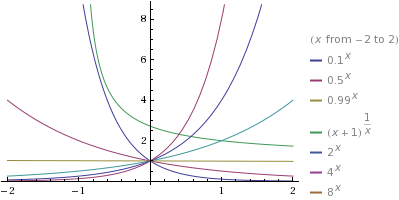
plot .1^x, .5^x, .99^x, (1 + x)^(1/x), 2^x, 4^x, 8^x
Here, some properties of exponential functions
- The domain of an exponential function is all real numbers
- The range is all positive real numbers
- Since
 for every base
  , each graph has y-intercept (0, 1). There is no x-intercept.
- If
 , then
  is an increasing function; its graph rises from left to right. Also
 and
and 
- Thus as
 , the graph has the x-axis as a horizontal asymptote.
- If
 , then
  is a decreasing function; its graph falls from left to right. Also
 and
and 
- Thus as
 , the graph has the x-axis as the horizontal asymptote.


